使用jar包导入
1
2
3
4
5
6
7
8
9
10
11
12
13
14
15
16
17
18
19
20
21
22
23
24
25
26
27
28
29
30
31
32
33
34
35
36
37
38
39
40
41
42
43
44
45
46
47
48
49
50
51
52
53
54
55
56
57
58
59
60
61
62
63
64
65
66
67
68
| <dependencies>
<dependency>
<groupId>org.springframework</groupId>
<artifactId>spring-webmvc</artifactId>
<version>5.3.23</version>
</dependency>
<dependency>
<groupId>org.springframework</groupId>
<artifactId>spring-jdbc</artifactId>
<version>5.3.23</version>
</dependency>
<dependency>
<groupId>junit</groupId>
<artifactId>junit</artifactId>
<version>4.13.2</version>
</dependency>
<dependency>
<groupId>org.aspectj</groupId>
<artifactId>aspectjweaver</artifactId>
<version>1.9.9.1</version>
</dependency>
<dependency>
<groupId>org.mybatis</groupId>
<artifactId>mybatis-spring</artifactId>
<version>2.0.6</version>
</dependency>
<dependency>
<groupId>org.mybatis</groupId>
<artifactId>mybatis</artifactId>
<version>3.5.7</version>
</dependency>
<dependency>
<groupId>mysql</groupId>
<artifactId>mysql-connector-java</artifactId>
<version>8.0.30</version>
</dependency>
<dependency>
<groupId>log4j</groupId>
<artifactId>log4j</artifactId>
<version>1.2.17</version>
</dependency>
<dependency>
<groupId>org.projectlombok</groupId>
<artifactId>lombok</artifactId>
<version>RELEASE</version>
<scope>compile</scope>
</dependency>
</dependencies>
|
Maven资源导出配置
1
2
3
4
5
6
7
8
9
10
11
12
13
14
15
16
17
18
19
20
| <build>
<resources>
<resource>
<directory>src/main/resources</directory>
<includes>
<include>**/*.properties</include>
<include>**/*.xml</include>
</includes>
<filtering>true</filtering>
</resource>
<resource>
<directory>src/main/java</directory>
<includes>
<include>**/*.properties</include>
<include>**/*.xml</include>
</includes>
<filtering>true</filtering>
</resource>
</resources>
</build>
|
1. IOC容器
控制反转IoC(Inversion of Control),是一种设计思想,DI(依赖注入)是实现IoC的一种方法,也有人认为DI只是IoC的另一种说法。没有IoC的程序中 , 我们使用面向对象编程
对象的创建与对象间的依赖关系完全硬编码在程序中,对象的创建由程序自己控制,控制反转后将对象的创建转移给第三方,个人认为所谓控制反转就是:获得依赖对象的方式反转了

1. xml配置文件开发
依赖注入
构造方法注入
- 使用
spring 创建对象 在spring都称为bean
bean 对象id 变量名class new的对象property 给对象中的属性赋值name 别名,可以取多个别名import 将多个配置文件合并value 具体的值,基本数据结构ref 引用spring容器中创建好的对象
无参构造实体类
1
2
3
4
5
6
7
| @Data
public class Hello {
private String str;
public Hello() {
System.out.println("Hello无参构造");
}
}
|
通过普通属性使用property标签通过set方法注入
1
2
3
| <bean id="hello" class="com.hg.pojo.Hello">
<property name="str" value="hello,spring"/>
</bean>
|
有参构造实体类
1
2
3
4
5
6
7
| @Data
public class User {
private String name;
public User(String name) {
this.name = name;
}
}
|
有参构造使用constructor-arg标签,可通过有参构造变量下标,变量名称,还有变量类型注入
- 通过下标
1
2
3
4
| <bean id="user1" class="com.hg.pojo.User">
<constructor-arg index="0" value="user1"/>
</bean>
|
- 通过名称
1
2
3
| <bean id="user2" class="com.hg.pojo.User">
<constructor-arg name="name" value="user2"/>
</bean>
|
- 通过类型
1
2
3
| <bean id="user3" class="com.hg.pojo.User">
<constructor-arg type="java.lang.String" value="user3"/>
</bean>
|
- 别名
1
2
|
<alias name="user3" alias="user"/>
|
测试
注意点 所有交给IOC容器注册的类,在容器不管是否使用,只要容器中有任何其他bea被使用,所有的bean都会被spring创建对象
1
2
3
4
5
6
7
8
9
10
11
12
13
14
15
16
17
18
| public class MyTest {
private static final ClassPathXmlApplicationContext context = new ClassPathXmlApplicationContext("beans.xml");
@Test
public void helloTest(){
Hello hello = (Hello) context.getBean("hello");
System.out.println(hello);
}
@Test
public void userTest(){
User user = (User) context.getBean("user");
System.out.println(user);
}
}
|
userTest测试方法使用,控制台输出

set方法注入
实体类
1
2
3
4
| @Data
public class Address {
private String address;
}
|
1
2
3
4
5
6
7
8
9
10
11
12
13
14
15
16
17
18
19
20
21
22
23
24
25
| @Data
public class Student {
private String name;
private Address address;
private String[] books;
private List<String> hobbys;
private Map<String,String> card;
private Set<String> games;
private String wife;
private Properties info;
@Override
public String toString() {
return "Student{" +
"name='" + name + '\'' +
", address=" + address.toString() +
", books=" + Arrays.toString(books) +
", hobbys=" + hobbys +
", card=" + card +
", games=" + games +
", wife='" + wife + '\'' +
", info=" + info +
'}';
}
}
|
Address类注入
1
2
3
| <bean id="address" class="com.hg.pojo.Address">
<property name="address" value="株洲"/>
</bean>
|
Student类注入
1
2
3
4
5
6
7
8
9
10
11
12
13
14
15
16
17
18
19
20
21
22
23
24
25
26
27
28
29
30
31
32
33
34
35
36
37
38
39
40
41
42
43
44
45
46
47
48
49
50
51
52
53
54
55
56
57
58
59
| <bean id="student" class="com.hg.pojo.Student">
<property name="name" value="hg"/>
<property name="address" ref="address"/>
<property name="books">
<array>
<value>数据结构</value>
<value>spring</value>
<value>mybatis</value>
<value>JavaScript</value>
</array>
</property>
<property name="hobbys">
<list>
<value>听歌</value>
<value>写代码</value>
<value>看电影</value>
</list>
</property>
<property name="card">
<map>
<entry key="身份证" value="43102820568963125899"/>
<entry key="银行卡" value="46858985549561811992"/>
</map>
</property>
<property name="games">
<set>
<value>LOL</value>
<value>DATA2</value>
</set>
</property>
<property name="wife">
<null/>
</property>
<property name="info">
<props>
<prop key="driver">mysql.cj.jdbc.driver</prop>
<prop key="url">www.mysql.com</prop>
<prop key="username">root</prop>
<prop key="password">123456</prop>
</props>
</property>
</bean>
|
测试
1
2
3
4
5
6
7
8
9
| public class MyTest {
private static final ClassPathXmlApplicationContext context = new ClassPathXmlApplicationContext("beans.xml");
@Test
public void test1(){
Student student = (Student) context.getBean("student");
System.out.println(student);
}
}
|
输出结果
1
2
3
4
5
6
7
8
9
10
11
12
13
14
| Student{
name='hg',
address=Address(address=株洲),
books=[数据结构, spring, mybatis, JavaScript],
hobbys=[听歌, 写代码, 看电影],
card={身份证=43102820568963125899, 银行卡=46858985549561811992},
games=[LOL, DATA2],
wife='null',
info={
password=123456,
url=www.mysql.com,
driver=mysql.cj.jdbc.driver,
username=root}
}
|
2. 注解开发
1. xml文件+注解
1
2
3
4
5
6
7
8
9
10
11
12
| <?xml version="1.0" encoding="UTF-8"?>
<beans xmlns="http://www.springframework.org/schema/beans"
xmlns:xsi="http://www.w3.org/2001/XMLSchema-instance"
xmlns:context="http://www.springframework.org/schema/context"
xsi:schemaLocation="http://www.springframework.org/schema/beans http://www.springframework.org/schema/beans/spring-beans.xsd
http://www.springframework.org/schema/context http://www.springframework.org/schema/context/spring-context.xsd">
<context:component-scan base-package="com.hg"/>
<context:annotation-config/>
</beans>
|
@Component注解
- 通过注解
@Component注册bean,
1
2
3
| @Component
public class Bean {
}
|
通过参数设置bean的id
1
2
3
| @Component("bean")
public class Bean {
}
|
- 注解
@Component的衍生类注解
@Repository注解,标志当前类为dao层
1
2
3
| @Repository("user")
public class User {
}
|
@Service 注解,标志当前类为service层
1
2
3
| @Service("userService")
public class UserService {
}
|
@controller 注解,标志当前类为controller层
1
2
3
| @controller("controller")
public class Controller {
}
|
自动装配注解
@Autowired注解 和 @Qualifier注解
Spring自动装配注解
byName属性 在容器上下文查找,通过(id)名字自动装配byType属性 在容器上下文查找,通过(class)类型自动装配- 默认优先通过
byType属性进行自动装配,如果有多个bean按照byName属性装配
1
2
3
4
5
6
7
| @Data
@Repository("user")
public class User {
@Autowired
@Qualifier("cat")
private Cat cat;
}
|
@Resource注解
Java自动装配注解
- 可指定
bean进行装配
- 默认优先通过类型进行自动装配,如果有多个
bean按照名称属性装配
@Value注解 和 @PropertySource注解
- 直接注入数值
1
2
3
4
5
6
7
8
9
10
| @Repository("cat")
public class Cat {
@Value("小猫")
private String name;
public void setName(String name) {
this.name = name;
}
}
|
- 注入外部配置文件数据需要配合
@PropertySource使用
1
2
3
4
5
6
7
8
9
10
11
12
13
14
15
16
17
18
19
20
21
22
23
24
25
26
| @Component("jdbc")
@PropertySource("classpath:db.properties")
public class JdbcUtil {
@Value("${driver}")
private String driver;
@Value("${url}")
private String url;
@Value("${name}")
private String username;
@Value("${password}")
private String password;
@Override
public String toString() {
return "JdbcUilt{" +
"driver='" + driver + '\'' +
", url='" + url + '\'' +
", username='" + username + '\'' +
", password='" + password + '\'' +
'}';
}
}
|
- 测试
1
2
3
4
5
6
7
8
| public class Test {
@org.junit.Test
public void valueTest(){
ApplicationContext context = new ClassPathXmlApplicationContext("applicationContext.xml");
JdbcUtil bean = (JdbcUtil) context.getBean("jdbc");
System.out.println(bean);
}
}
|
作用域和生命周期注解
单例模式
单例模式(Singleton Pattern)是 Java 中最简单的设计模式之一。这种类型的设计模式属于创建型模式,它提供了一种创建对象的最佳方式。
这种模式涉及到一个单一的类,该类负责创建自己的对象,同时确保只有单个对象被创建。这个类提供了一种访问其唯一的对象的方式,可以直接访问,不需要实例化该类的对象。
- 单例类只能有一个实例。
- 单例类必须自己创建自己的唯一实例。
- 单例类必须给所有其他对象提供这一实例。
- 保证一个类仅有一个实例,并提供一个访问它的全局访问点。
- 避免了一个全局使用的类频繁地创建与销毁。
原型模式
原型模式(Prototype Pattern)是用于创建重复的对象,同时又能保证性能。这种类型的设计模式属于创建型模式,它提供了一种创建对象的最佳方式。
这种模式是实现了一个原型接口,该接口用于创建当前对象的克隆。当直接创建对象的代价比较大时,则采用这种模式。
例如,一个对象需要在一个高代价的数据库操作之后被创建。我们可以缓存该对象,在下一个请求时返回它的克隆,在需要的时候更新数据库,以此来减少数据库调用。
@Scope注解 ,@PostConstruct注解,和@PreDestroy注解
@Scope 注解定义bean的作用域,默认为单例模式@PostConstruct 注解定义方法在构造方法后执行@PreDestroy 注解定义方法在销毁之前执行
1
2
3
4
5
6
7
8
9
10
11
12
13
14
15
16
17
18
19
20
21
22
23
24
25
| @Data
@Repository("user")
@Scope("singleton")
public class User {
@Value("1")
private int id;
@Value("张三")
private String name;
@Autowired
@Qualifier("cat")
private Cat cat;
@PostConstruct
public void init(){
System.out.println("init.....");
}
@PreDestroy
public void destroy(){
System.out.println("destroy.....");
}
}
|
测试
1
2
3
4
5
6
7
8
9
10
11
12
13
14
15
16
17
| public class Test {
@org.junit.Test
public void scopeTest(){
ClassPathXmlApplicationContext context = new ClassPathXmlApplicationContext("applicationContext.xml");
User user1 = (User) context.getBean("user");
User user2 = (User) context.getBean("user");
System.out.println(user1.hashCode());
System.out.println(user2.hashCode());
context.close();
}
}
|
- 单例模式测试
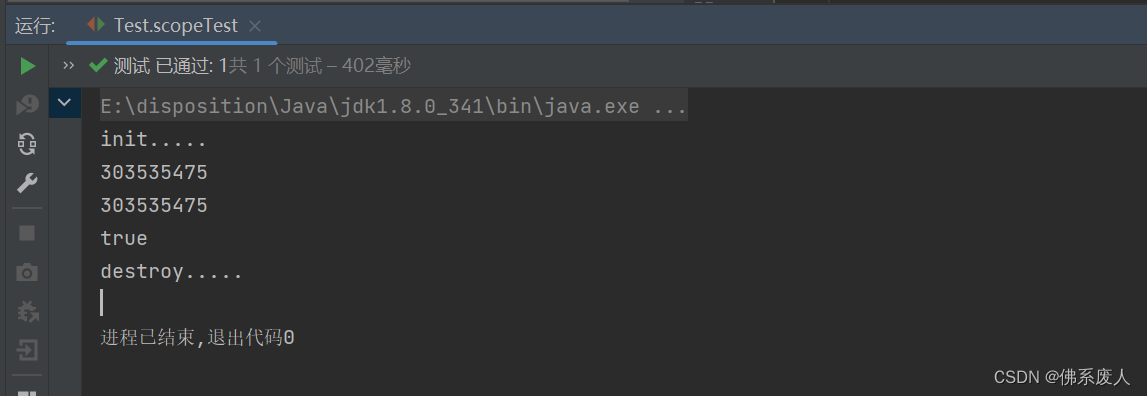
- 原型模式测试

2. 配置类+注解
@Configuration注解定义该类为配置类,可舍弃xml配置文件@ComponentScan扫描包,该注解只能添加一次,多个数据可以使用数组格式@Import导入第三方bean,多个数据可以使用数组格式
1
2
3
4
5
6
7
| import javax.xml.soap.Text;
@Configuration
@ComponentScan({"com.hg.pojo", "com.hg.service", "com.hg.config"})
@Import(Text.class)
public class SpringConfig {
}
|
测试
1
2
3
4
5
6
7
8
9
10
11
12
| public class Test {
@org.junit.Test
public void classTest() {
ApplicationContext context = new AnnotationConfigApplicationContext(SpringConfig.class);
User user = (User) context.getBean("user");
System.out.println(user);
}
}
|
3. 注解开发和xml开发对比

2. AOP
1. 代理模式
在代理模式(Proxy Pattern)中,一个类代表另一个类的功能。这种类型的设计模式属于结构型模式。
在代理模式中,我们创建具有现有对象的对象,以便向外界提供功能接口。
为其他对象提供一种代理以控制对这个对象的访问。

1. 静态代理
在不改变实现类的情况下,对实现类进行功能的增加,由此而产生了代理类,生成代理对象,通过代理对象去实现需要添加的功能
举个栗子通过中介租房
租客租房子一般都找不到房东,房东也不会轻易将自己暴露给广大租客,因此就需要中介来充当这个中间关系,
因此租客就只能通过中介来进行租房子这个工作,不需要通过房东,这就叫做代理—-就是中介代理房东来处理租房子这件事情
租房(目标客户)
1
2
3
4
| public interface Renting {
void house();
}
|
租客(代理类)
1
2
3
4
5
6
| public class User implements Renting{
@Override
public void house() {
System.out.println("用户要租房");
}
}
|
中介(代理)
1
2
3
4
5
6
7
8
9
10
11
12
13
14
15
16
| public class Agency implements Renting{
private Renting renting;
public Agency(Renting renting) {
this.renting = renting;
}
@Override
public void house() {
System.out.println(this.renting.getClass().getName());
System.out.println("通过中介租房需要支付中介费");
renting.house();
}
}
|
测试
1
2
3
4
5
6
7
8
| public class Test {
@org.junit.Test
public void staticProxy(){
User user = new User();
Agency agency = new Agency(user);
agency.house();
}
}
|
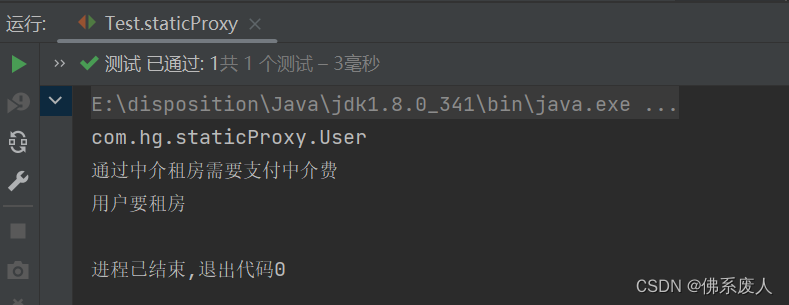
缺点: 当实际开发中有很多这样的主题接口和类需要功能增强时,就需要更多的代理类,即每一个主题接口都得创建一个代理类,会造成代码的繁多和冗余
2. 动态代理
动态代理:无需声明式的创建java代理类,而是在运行过程中生成”虚拟”的代理类,被ClassLoader加载。从而避免了静态代理那样需要声明大量的代理类。

出售
1
2
3
| public interface UsbSell {
float sell(int amount);
}
|
U盘厂商出售U盘(目标类)
1
2
3
4
5
6
7
8
| public class UsbKingFactory implements UsbSell {
@Override
public float sell(int amount) {
System.out.println("目标类中执行了sell目标方法");
return 85.0f;
}
}
|
经销商代理(代理类)
1
2
3
4
5
6
7
8
9
10
11
12
13
14
15
16
17
18
19
20
21
22
23
24
25
26
27
| public class MySellHeader implements InvocationHandler {
private Object target;
public MySellHeader(Object target) {
this.target = target;
}
@Override
public Object invoke(Object proxy, Method method, Object[] args) throws Throwable {
Object res = method.invoke(target, args);
if (res != null ){
Float price = (Float) res;
price = (price + 25) * (Integer)args[0];
res = price;
}
System.out.println("动态代理");
return res;
}
}
|
用户购买U盘
1
2
3
4
5
6
7
8
9
10
11
12
13
14
| public class MainShop {
public static void main(String[] args) {
UsbSell factory = new UsbKingFactory();
MySellHeader header = new MySellHeader(factory);
UsbSell proxy = (UsbSell) Proxy.newProxyInstance(factory.getClass().getClassLoader(),
factory.getClass().getInterfaces(),
header);
System.out.println(proxy.sell(2));
}
}
|
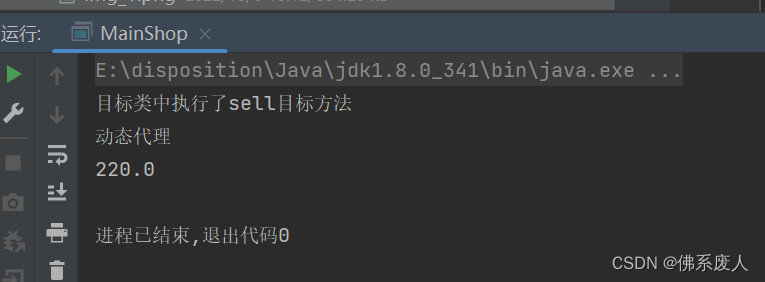
2. AOP织入
方式一
接口
1
2
3
4
5
6
| public interface UserService {
void add();
void delete();
void update();
void select();
}
|
切入前日志
1
2
3
4
5
6
7
| public class AfterLog implements AfterReturningAdvice {
@Override
public void afterReturning(Object returnValue, Method method, Object[] args, Object target) throws Throwable {
System.out.println("执行了" + method.getName() + "返回了" + returnValue);
}
}
|
切入后日志
1
2
3
4
5
6
7
8
9
10
11
12
13
14
| public class Log implements MethodBeforeAdvice {
@Override
public void before(Method method, Object[] args, Object target) throws Throwable {
System.out.println(target.getClass().getName()+"的"+method.getName()+"被执行了");
}
}
|
切入对象类
1
2
3
4
5
6
7
8
9
10
11
12
13
14
15
16
17
18
19
20
21
22
| public class UserServiceImpl implements UserService{
@Override
public void add() {
System.out.println("增加了一个用户");
}
@Override
public void delete() {
System.out.println("删除了一个用户");
}
@Override
public void update() {
System.out.println("修改了一个用户");
}
@Override
public void select() {
System.out.println("查找了一个用户");
}
}
|
xml配置
1
2
3
4
5
6
7
8
9
10
11
12
13
14
15
16
17
18
19
20
21
22
| <?xml version="1.0" encoding="UTF-8"?>
<beans xmlns="http://www.springframework.org/schema/beans"
xmlns:xsi="http://www.w3.org/2001/XMLSchema-instance" xmlns:aop="http://www.springframework.org/schema/aop"
xsi:schemaLocation="http://www.springframework.org/schema/beans http://www.springframework.org/schema/beans/spring-beans.xsd
http://www.springframework.org/schema/aop https://www.springframework.org/schema/aop/spring-aop.xsd">
<bean id="userService" class="com.hg.service.UserServiceImpl"/>
<bean id="log" class="com.hg.log.AfterLog"/>
<bean id="afterLog" class="com.hg.log.Log"/>
<aop:config>
<aop:pointcut id="pointcut" expression="execution(* com.hg.service.UserServiceImpl.*(..))"/>
<aop:advisor advice-ref="log" pointcut-ref="pointcut"/>
<aop:advisor advice-ref="afterLog" pointcut-ref="pointcut"/>
</aop:config>
</beans>
|
测试
1
2
3
4
5
6
7
8
9
10
| public class MyTest {
private static final ApplicationContext context = new ClassPathXmlApplicationContext("applicationContext.xml");
@Test
public void test() {
UserService bean = (UserService) context.getBean("userService");
bean.add();
}
}
|
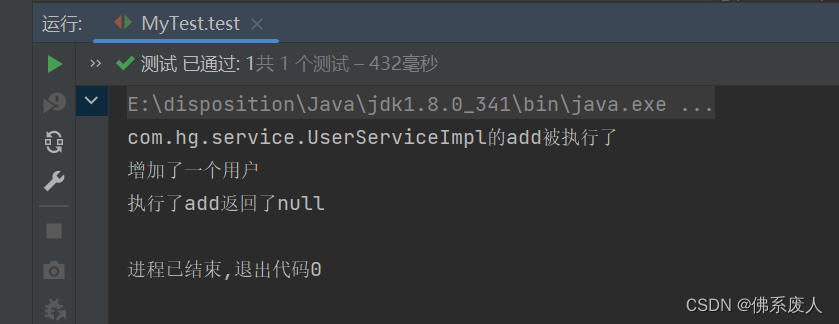
方式二
自己定义切入
1
2
3
4
5
6
7
8
9
| public class DiyPointCut {
public void before(){
System.out.println("==================方法执行前=================");
}
public void after(){
System.out.println("==================方法执行后=================");
}
}
|
配置文件
1
2
3
4
5
6
7
8
9
10
11
12
13
|
<bean id="diy" class="com.hg.diy.DiyPointCut"/>
<aop:config>
<aop:aspect ref="diy">
<aop:pointcut id="pointcut" expression="execution(* com.hg.service.UserServiceImpl.*(..))"/>
<aop:before method="before" pointcut-ref="pointcut"/>
<aop:after method="after" pointcut-ref="pointcut"/>
</aop:aspect>
</aop:config>
|
测试
1
2
3
4
5
6
7
8
9
10
|
public class MyTest {
@Test
public void test2() {
ApplicationContext context = new ClassPathXmlApplicationContext("diyPointCut.xml");
UserService bean = (UserService) context.getBean("userService");
bean.add();
}
}
|
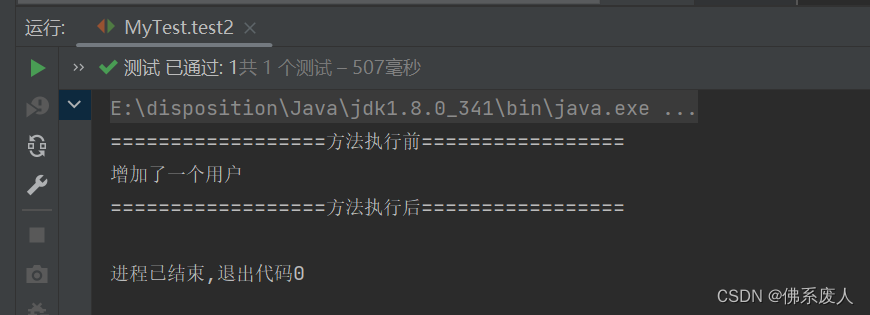
方式三
通过注解
1
2
3
4
5
6
|
<aop:aspectj-autoproxy />
|
1
2
3
4
5
6
7
8
9
10
11
12
13
14
15
16
17
18
| @Component
@Aspect
public class AnnotationPointCut {
@Before("execution(* com.hg.service.UserServiceImpl.*(..))")
public void before(){
System.out.println("==================方法执行前=================");
}
@After("execution(* com.hg.service.UserServiceImpl.*(..))")
public void after(){
System.out.println("==================方法执行后=================");
}
@Around("execution(* com.hg.service.UserServiceImpl.*(..))")
public void Around(ProceedingJoinPoint pj) throws Throwable {
System.out.println(" 环绕前 ");
pj.proceed();
System.out.println(" 环绕后 ");
}
}
|
测试
1
2
3
4
5
6
7
8
| public class MyTest {
@Test
public void test3(){
ApplicationContext context = new ClassPathXmlApplicationContext("annotationPointCut.xml");
UserService bean = (UserService) context.getBean("userService");
bean.add();
}
}
|
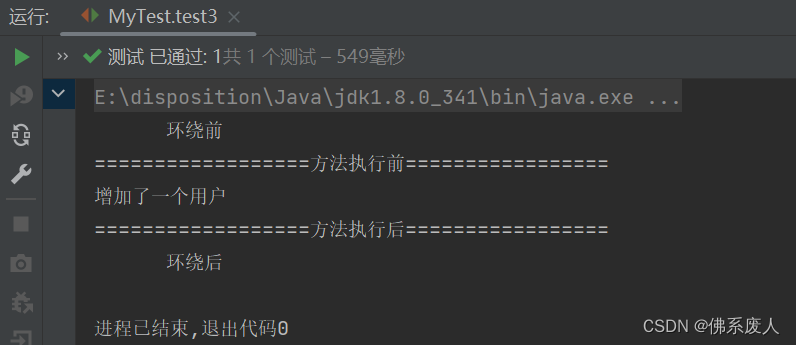
3. 整合Mybatis
实体类
1
2
3
4
5
6
7
8
9
| @Data
@AllArgsConstructor
@NoArgsConstructor
@SuppressWarnings("all")
public class User {
private int id;
private String name;
private String pwd;
}
|
接口
1
2
3
4
| @SuppressWarnings("all")
public interface UserMapper {
public List<User> getUser();
}
|
UserMapper接口映射文件
1
2
3
4
5
6
7
8
9
10
| <?xml version="1.0" encoding="UTF-8" ?>
<!DOCTYPE mapper
PUBLIC "-//mybatis.org//DTD Mapper 3.0//EN"
"https://mybatis.org/dtd/mybatis-3-mapper.dtd">
<mapper namespace="com.hg.mapper.UserMapper">
<select id="getUser" resultType="user">
select * from mybatis.user
</select>
</mapper>
|
mybatis核心配置文件
1
2
3
4
5
6
7
8
9
10
11
12
13
14
15
16
17
18
19
| <?xml version="1.0" encoding="UTF-8" ?>
<!DOCTYPE configuration
PUBLIC "-//mybatis.org//DTD Config 3.0//EN"
"https://mybatis.org/dtd/mybatis-3-config.dtd">
<configuration>
<settings>
<setting name="logImpl" value="STDOUT_LOGGING"/>
<setting name="mapUnderscoreToCamelCase" value="true"/>
</settings>
<typeAliases>
<package name="com.hg.pojo"/>
</typeAliases>
</configuration>
|
bean管理文件
1
2
3
4
5
6
7
8
9
10
11
12
13
14
15
16
| <?xml version="1.0" encoding="UTF-8"?>
<beans xmlns="http://www.springframework.org/schema/beans"
xmlns:xsi="http://www.w3.org/2001/XMLSchema-instance"
xsi:schemaLocation="http://www.springframework.org/schema/beans http://www.springframework.org/schema/beans/spring-beans.xsd">
<import resource="classpath:springConfig.xml"/>
<bean id="userMapperImpl" class="com.hg.mapper.UserMapperImpl">
<property name="sqlSession" ref="sqlSessionTemplate"/>
</bean>
<bean id="userMapperImpl2" class="com.hg.mapper.UserMapperImpl2">
<property name="sqlSessionFactory" ref="sqlSessionFactory"/>
</bean>
</beans>
|
spring配置
1
2
3
4
5
6
7
8
9
10
11
12
13
14
15
16
17
18
19
20
21
22
23
24
25
26
27
28
29
| <?xml version="1.0" encoding="UTF-8"?>
<beans xmlns="http://www.springframework.org/schema/beans"
xmlns:xsi="http://www.w3.org/2001/XMLSchema-instance"
xsi:schemaLocation="http://www.springframework.org/schema/beans http://www.springframework.org/schema/beans/spring-beans.xsd">
<bean id="dataSource" class="org.springframework.jdbc.datasource.DriverManagerDataSource">
<property name="driverClassName" value="com.mysql.cj.jdbc.Driver"/>
<property name="url"
value="jdbc:mysql://localhost:3306/mybatis?useSSL=true&useUnicode=true&characterEncoding=UTF-8"/>
<property name="username" value="root"/>
<property name="password" value="123456"/>
</bean>
<bean id="sqlSessionFactory" class="org.mybatis.spring.SqlSessionFactoryBean">
<property name="dataSource" ref="dataSource"/>
<property name="configLocation" value="classpath:mybatisConfig.xml"/>
<property name="mapperLocations" value="classpath:com/hg/mapper/*.xml"/>
</bean>
<bean id="sqlSessionTemplate" class="org.mybatis.spring.SqlSessionTemplate">
<constructor-arg index="0" ref="sqlSessionFactory"/>
</bean>
</beans>
|
方式一
接口实现
1
2
3
4
5
6
7
8
9
10
11
12
13
14
15
16
| public class UserMapperImpl implements UserMapper{
private SqlSessionTemplate sqlSession;
public void setSqlSession(SqlSessionTemplate sqlSession) {
this.sqlSession = sqlSession;
}
@Override
public List<User> getUser() {
UserMapper mapper = sqlSession.getMapper(UserMapper.class);
return mapper.getUser();
}
}
|
测试
1
2
3
4
5
6
7
8
| public class MyTest {
@Test
public void implTest1() {
ApplicationContext context = new ClassPathXmlApplicationContext("applicationContext.xml");
UserMapper userMapper = (UserMapper) context.getBean("userMapperImpl");
userMapper.getUser();
}
}
|

方式二
通过继承SqlSessionDaoSupport直接使用getSqlSessionTemplate
1
2
3
4
5
6
7
| public class UserMapperImpl2 extends SqlSessionDaoSupport implements UserMapper{
@Override
public List<User> getUser() {
return getSqlSessionTemplate().getMapper(UserMapper.class).getUser();
}
}
|
测试
1
2
3
4
5
6
7
8
| public class MyTest {
@Test
public void implTest2(){
ApplicationContext context = new ClassPathXmlApplicationContext("applicationContext.xml");
UserMapper userMapper = (UserMapper) context.getBean("userMapperImpl2");
userMapper.getUser();
}
}
|

4. 事务
事务的 ACID 原则
1. 事务的原子性(Atomicity)
是指一个事务要么全部执行,要么不执行,也就是说一个事务不可能只执行了一半就停止了。
比如你从取款机取钱,这个事务可以分成两个步骤:1划卡,2出钱。不可能划了卡,而钱却没出来。这两步必须同时完成,要么就不完成。
2. 事务的一致性(Consistency)
是指事务的运行并不改变数据库中数据的一致性。例如,完整性约束了a+b=10,一个事务改变了a,那么b也应该随之改变。
3. 独立性(Isolation)
事务的独立性也称作隔离性,是指两个以上的事务不会出现交错执行的状态。因为这样可能会导致数据不一致,更加具体的来讲,就是事务之间的操作是独立的。
4. 持久性(Durability)
事务的持久性是指事务执行成功以后,该事务对数据库所作的更改便是持久的保存在数据库之中,不会无缘无故的回滚。
事务的传播特性
PROPAGATION_REQUIRED:默认事务类型,如果没有,就新建一个事务;如果有,就加入当前事务。适合绝大多数情况。PROPAGATION_REQUIRES_NEW:如果没有,就新建一个事务;如果有,就将当前事务挂起。PROPAGATION_NESTED:如果没有,就新建一个事务;如果有,就在当前事务中嵌套其他事务。PROPAGATION_SUPPORTS:如果没有,就以非事务方式执行;如果有,就使用当前事务。PROPAGATION_NOT_SUPPORTED:如果没有,就以非事务方式执行;如果有,就将当前事务挂起。即无论如何不支持事务。PROPAGATION_NEVER:如果没有,就以非事务方式执行;如果有,就抛出异常。PROPAGATION_MANDATORY:如果没有,就抛出异常;如果有,就使用当前事务。
接口
1
2
3
4
5
6
7
| public interface UserMapper {
public List<User> getUser();
public int addUser(User user);
public int delUser(int id);
}
|
接口映射
1
2
3
4
5
6
7
8
9
10
11
12
13
14
15
16
17
18
| <?xml version="1.0" encoding="UTF-8" ?>
<!DOCTYPE mapper
PUBLIC "-//mybatis.org//DTD Mapper 3.0//EN"
"https://mybatis.org/dtd/mybatis-3-mapper.dtd">
<mapper namespace="com.hg.mapper.UserMapper">
<select id="getUser" resultType="user">
select * from mybatis.user
</select>
<insert id="addUser" parameterType="user">
insert into mybatis.user(name, pwd) VALUES (#{name},#{pwd})
</insert>
<delete id="delUser" parameterType="_int">
delete from mybatis.user where id = #{id}
</delete>
</mapper>
|
bean
1
2
3
4
5
6
7
8
9
10
11
12
13
| <?xml version="1.0" encoding="UTF-8"?>
<beans xmlns="http://www.springframework.org/schema/beans"
xmlns:xsi="http://www.w3.org/2001/XMLSchema-instance"
xsi:schemaLocation="http://www.springframework.org/schema/beans http://www.springframework.org/schema/beans/spring-beans.xsd">
<import resource="classpath:springConfig.xml"/>
<bean id="userMapperImpl" class="com.hg.mapper.UserMapperImpl">
<property name="sqlSessionFactory" ref="sqlSessionFactory"/>
</bean>
</beans>
|
mybatis配置
1
2
3
4
5
6
7
8
9
10
11
12
13
14
15
16
17
18
| <?xml version="1.0" encoding="UTF-8" ?>
<!DOCTYPE configuration
PUBLIC "-//mybatis.org//DTD Config 3.0//EN"
"https://mybatis.org/dtd/mybatis-3-config.dtd">
<configuration>
<settings>
<setting name="logImpl" value="STDOUT_LOGGING"/>
<setting name="mapUnderscoreToCamelCase" value="true"/>
</settings>
<typeAliases>
<package name="com.hg.pojo"/>
</typeAliases>
</configuration>
|
spring配置
1
2
3
4
5
6
7
8
9
10
11
12
13
14
15
16
17
18
19
20
21
22
23
24
25
26
27
28
29
30
31
32
33
34
35
36
37
38
39
40
41
42
43
44
45
46
47
48
49
50
51
52
| <?xml version="1.0" encoding="UTF-8"?>
<beans xmlns="http://www.springframework.org/schema/beans"
xmlns:xsi="http://www.w3.org/2001/XMLSchema-instance"
xmlns:aop="http://www.springframework.org/schema/aop"
xmlns:tx="http://www.springframework.org/schema/tx"
xsi:schemaLocation="http://www.springframework.org/schema/beans http://www.springframework.org/schema/beans/spring-beans.xsd
http://www.springframework.org/schema/aop https://www.springframework.org/schema/aop/spring-aop.xsd
http://www.springframework.org/schema/tx https://www.springframework.org/schema/tx/spring-tx.xsd">
<bean id="dataSource" class="org.springframework.jdbc.datasource.DriverManagerDataSource">
<property name="driverClassName" value="com.mysql.cj.jdbc.Driver"/>
<property name="url"
value="jdbc:mysql://localhost:3306/mybatis?useSSL=true&useUnicode=true&characterEncoding=UTF-8"/>
<property name="username" value="root"/>
<property name="password" value="123456"/>
</bean>
<bean id="sqlSessionFactory" class="org.mybatis.spring.SqlSessionFactoryBean">
<property name="dataSource" ref="dataSource"/>
<property name="configLocation" value="classpath:mybatisConfig.xml"/>
<property name="mapperLocations" value="classpath:com/hg/mapper/*.xml"/>
</bean>
<bean id="transactionManagement" class="org.springframework.jdbc.datasource.DataSourceTransactionManager">
<property name="dataSource" ref="dataSource"/>
</bean>
<tx:advice transaction-manager="transactionManagement" id="txAdvisor">
<tx:attributes>
<tx:method name="addUser" propagation="REQUIRED"/>
<tx:method name="delUser" propagation="REQUIRED"/>
<tx:method name="*"/>
</tx:attributes>
</tx:advice>
<aop:config>
<aop:pointcut id="aopPointcut" expression="execution(* com.hg.mapper.*.*(..))"/>
<aop:advisor advice-ref="txAdvisor" pointcut-ref="aopPointcut"/>
</aop:config>
</beans>
|
接口实现
1
2
3
4
5
6
7
8
9
10
11
12
13
14
15
16
17
18
19
20
21
| public class UserMapperImpl extends SqlSessionDaoSupport implements UserMapper{
@Override
public List<User> getUser() {
UserMapper mapper = getSqlSessionTemplate().getMapper(UserMapper.class);
User user = new User(5, "李兴", "123456");
mapper.addUser(user);
mapper.delUser(25);
return mapper.getUser();
}
@Override
public int addUser(User user) {
return getSqlSessionTemplate().getMapper(UserMapper.class).addUser(user);
}
@Override
public int delUser(int id) {
return getSqlSessionTemplate().getMapper(UserMapper.class).delUser(id);
}
}
|
事务测试
数据库原始数据
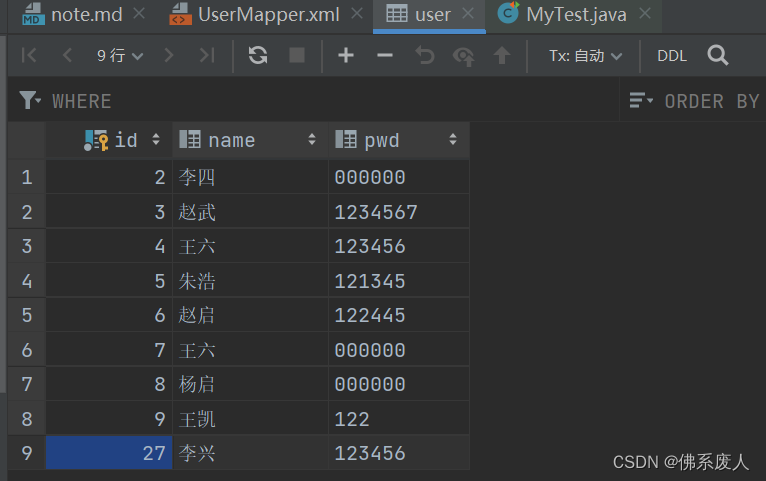
1
2
3
4
5
6
7
8
9
10
11
12
| public class MyTest {
@Test
public void test(){
ApplicationContext context = new ClassPathXmlApplicationContext("applicationContext.xml");
UserMapper userMapper = (UserMapper) context.getBean("userMapperImpl");
List<User> user = userMapper.getUser();
for (User user1 : user) {
System.out.println(user1);
}
}
}
|
- 通过修改sql语句制造错误

运行结果
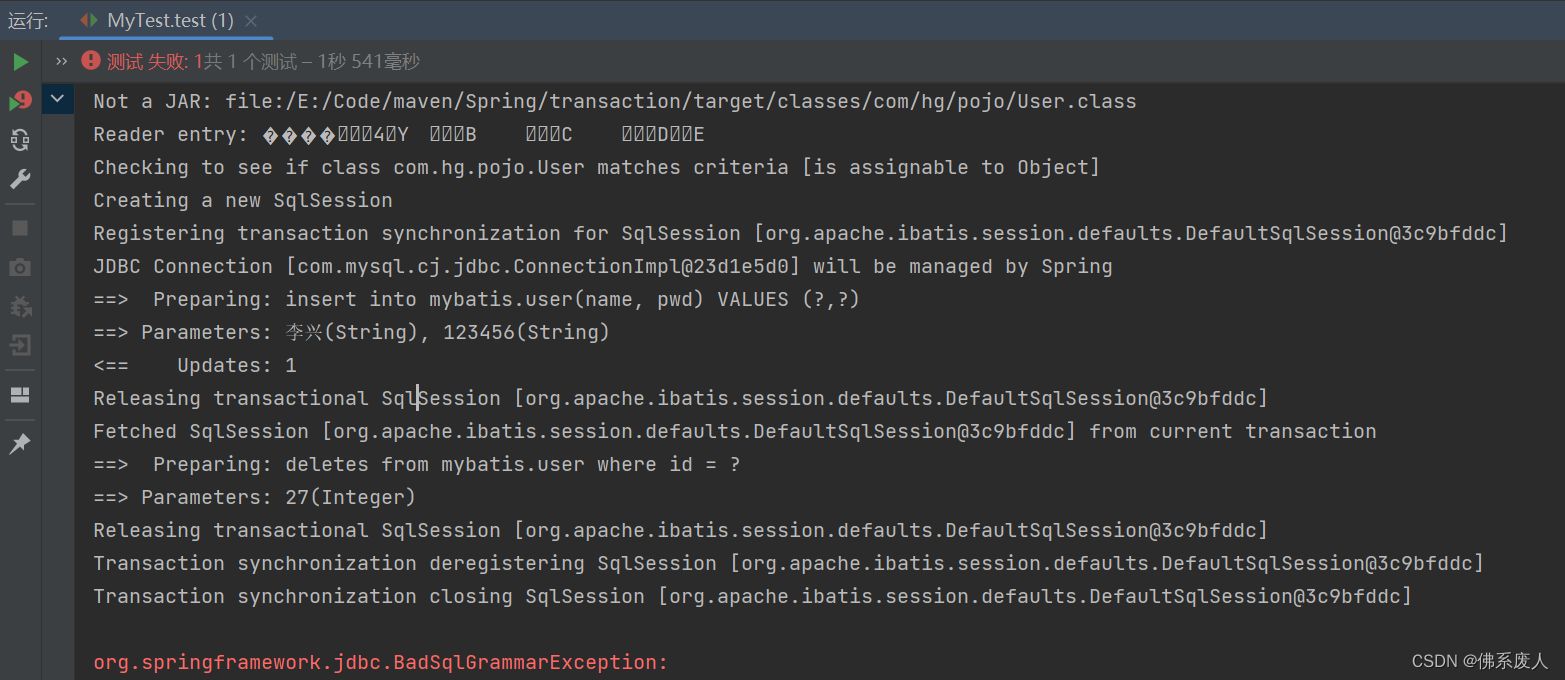
尽管运行日志中显示插入一条数据,但此时因为删除操作sql语句的错误,数据库中并没有写入数据

- 使用正确的sql语句进行测试
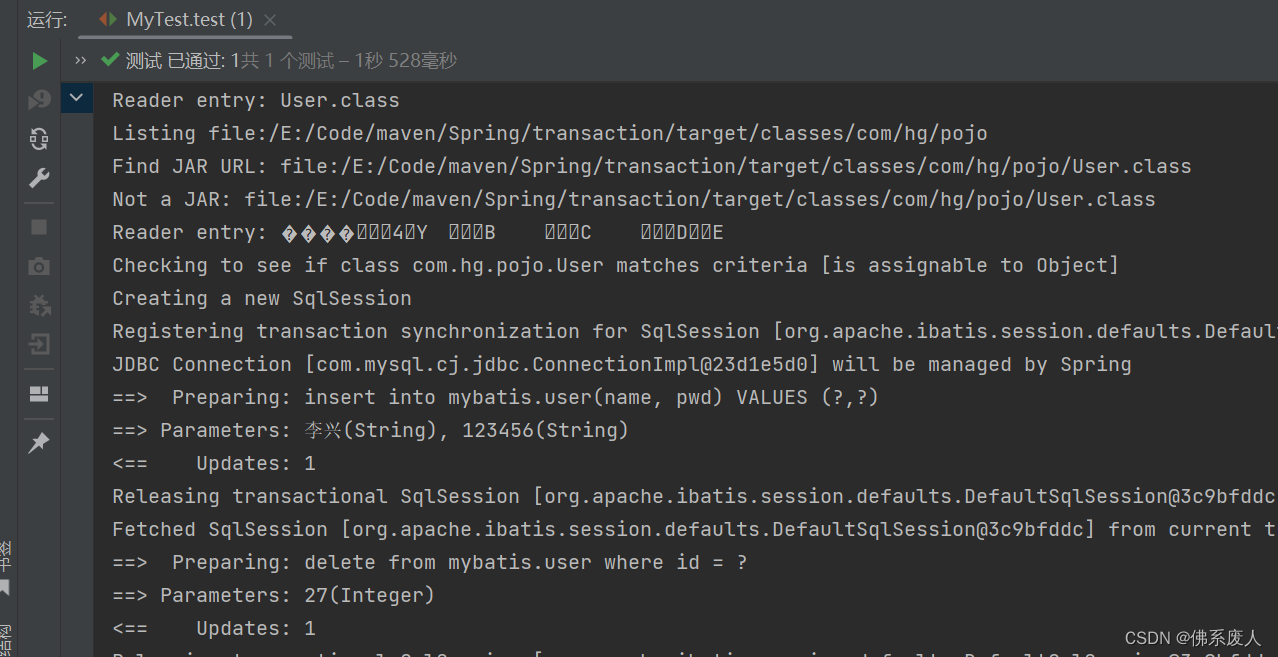
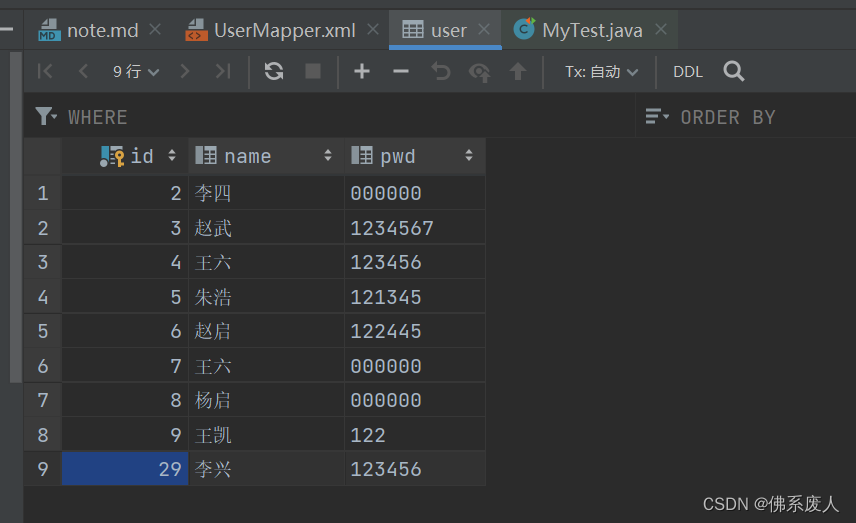
测试通过的同时,数据库中也对应的更新了数据
SSM资源整合
Maven配置
1
2
3
4
5
6
7
8
9
10
11
12
13
14
15
16
17
18
19
20
21
22
23
24
25
26
27
28
29
30
31
32
33
34
35
36
37
38
39
40
41
42
43
44
45
46
47
48
49
50
51
52
53
54
55
56
57
58
59
60
61
62
63
64
65
66
67
68
69
70
71
72
73
74
75
76
77
78
79
80
81
82
83
84
85
86
|
<dependencies>
<dependency>
<groupId>org.springframework</groupId>
<artifactId>spring-webmvc</artifactId>
<version>5.3.23</version>
</dependency>
<dependency>
<groupId>org.mybatis</groupId>
<artifactId>mybatis</artifactId>
<version>3.5.11</version>
</dependency>
<dependency>
<groupId>org.mybatis</groupId>
<artifactId>mybatis-spring</artifactId>
<version>2.0.7</version>
</dependency>
<dependency>
<groupId>org.springframework</groupId>
<artifactId>spring-webmvc</artifactId>
<version>5.3.23</version>
</dependency>
<dependency>
<groupId>org.springframework</groupId>
<artifactId>spring-jdbc</artifactId>
<version>5.3.23</version>
</dependency>
<dependency>
<groupId>junit</groupId>
<artifactId>junit</artifactId>
<version>4.13.2</version>
</dependency>
<dependency>
<groupId>mysql</groupId>
<artifactId>mysql-connector-java</artifactId>
<version>8.0.30</version>
</dependency>
<dependency>
<groupId>com.mchange</groupId>
<artifactId>c3p0</artifactId>
<version>0.9.5.5</version>
</dependency>
<dependency>
<groupId>javax.servlet</groupId>
<artifactId>javax.servlet-api</artifactId>
<version>4.0.1</version>
</dependency>
<dependency>
<groupId>javax.servlet</groupId>
<artifactId>jsp-api</artifactId>
<version>2.0</version>
</dependency>
<dependency>
<groupId>jstl</groupId>
<artifactId>jstl</artifactId>
<version>1.2</version>
</dependency>
<dependency>
<groupId>org.projectlombok</groupId>
<artifactId>lombok</artifactId>
<version>RELEASE</version>
</dependency>
<dependency>
<groupId>com.google.code.gson</groupId>
<artifactId>gson</artifactId>
<version>2.9.1</version>
</dependency>
</dependencies>
|
1
2
3
4
5
6
7
8
9
10
11
12
13
14
15
16
17
18
19
20
21
22
|
<build>
    <resources>
        <resource>
            <directory>src/main/resources</directory>
            <includes>
                <include>**/*.properties</include>
                <include>**/*.xml</include>
            </includes>
            <filtering>true</filtering>
        </resource>
        <resource>
            <directory>src/main/java</directory>
            <includes>
                <include>**/*.properties</include>
                <include>**/*.xml</include>
            </includes>
            <filtering>true</filtering>
        </resource>
    </resources>
</build>
|
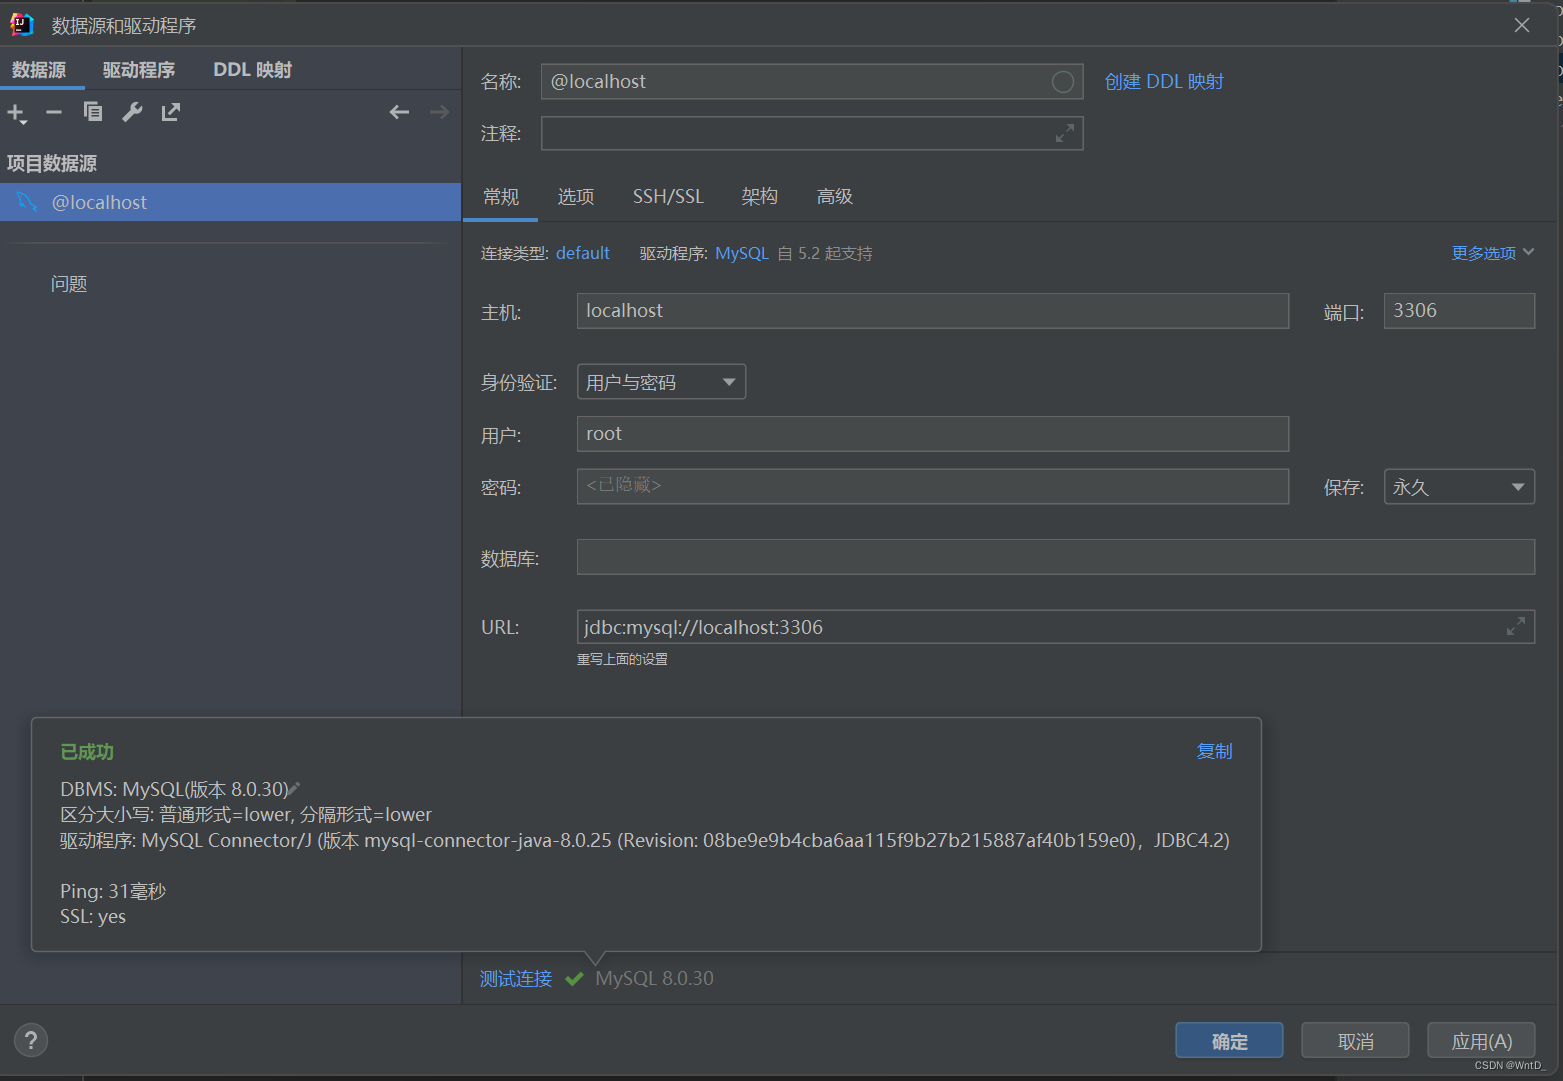
数据库连接
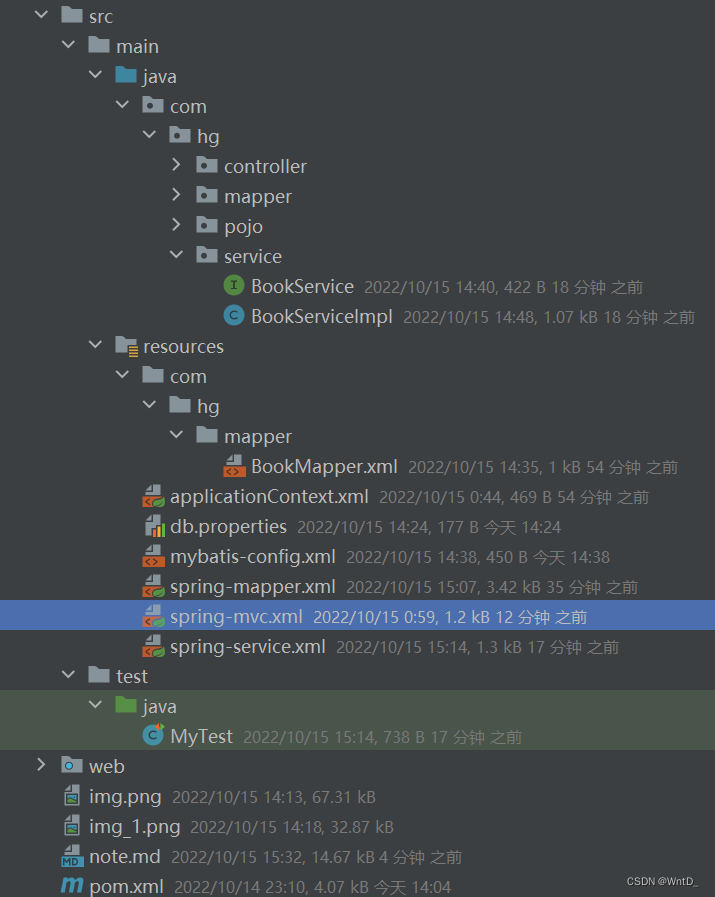
- 建立基本结构和配置框架
整合Mybatis
1
2
3
4
| driver=com.mysql.cj.jdbc.Driver
url=jdbc:mysql://localhost:3306/ssmbuild?useSSL=true&useUnicode=true&characterEncoding=UTF-8&serverTimezone=GMT
username=root
password=WntD436
|
1
2
3
4
5
6
7
8
9
10
11
12
13
14
15
16
17
| <?xml version="1.0" encoding="UTF-8" ?>
<!DOCTYPE configuration
PUBLIC "-//mybatis.org//DTD Config 3.0//EN"
"https://mybatis.org/dtd/mybatis-3-config.dtd">
<configuration>
<typeAliases>
<package name="com.hg.pojo"/>
</typeAliases>
<mappers>
<mapper resource="com/hg/mapper/BookMapper"/>
</mappers>
</configuration>
|
- 编写数据库实体类(实体类名称Books避免与java本身Book混淆)
1
2
3
4
5
6
7
8
9
| @Data
@AllArgsConstructor
@NoArgsConstructor
public class Books {
private int bookID;
private String bookName;
private int bookCounts;
private String detail;
}
|
1
2
3
4
5
6
7
8
9
10
11
12
13
| @SuppressWarnings("all")
public interface BookMapper {
int addBook(Books book);
int deleteBookById(@Param("bookID") int id);
Books queryBookById(@Param("bookID") int id);
int updateBook(Books book);
List<Books> queryAllBook();
}
|
1
2
3
4
5
6
7
8
9
10
11
12
13
14
15
16
17
18
19
20
21
22
23
24
25
26
27
28
29
30
| <?xml version="1.0" encoding="UTF-8" ?>
<!DOCTYPE mapper
PUBLIC "-//mybatis.org//DTD Mapper 3.0//EN"
"https://mybatis.org/dtd/mybatis-3-mapper.dtd">
<mapper namespace="com.hg.mapper.BookMapper">
<insert id="addBook" parameterType="Books">
insert into ssmbuild.books(bookName, bookCounts, detail)
VALUES (#{bookName},#{bookCounts},#{detail});
</insert>
<delete id="deleteBookById" parameterType="_int">
delete from ssmbuild.books where bookID = #{bookID};
</delete>
<select id="queryBookById" resultType="Books">
select * from ssmbuild.books where bookID = #{bookID};
</select>
<update id="updateBook" parameterType="Books">
update ssmbuild.books
set bookName = #{bookName},bookCounts = #{bookCounts},detail = #{detail}
where bookID = #{bookID};
</update>
<select id="queryAllBook" resultType="Books">
select * from ssmbuild.books;
</select>
</mapper>
|
service层编写
1
2
3
4
5
6
7
8
9
10
11
12
13
| @SuppressWarnings("all")
public interface BookService {
int addBook(Books book);
int deleteBookById(int id);
Books queryBookById(int id);
int updateBook(Books book);
List<Books> queryAllBook();
}
|
1
2
3
4
5
6
7
8
9
10
11
12
13
14
15
16
17
18
19
20
21
22
23
24
25
26
27
28
29
30
31
32
| public class BookServiceImpl implements BookService{
BookMapper bookMapper;
public void setBookMapper(BookMapper bookMapper) {
this.bookMapper = bookMapper;
}
@Override
public int addBook(Books book) {
return bookMapper.addBook(book);
}
@Override
public int deleteBookById(int id) {
return bookMapper.deleteBookById(id);
}
@Override
public Books queryBookById(int id) {
return bookMapper.queryBookById(id);
}
@Override
public int updateBook(Books book) {
return bookMapper.updateBook(book);
}
@Override
public List<Books> queryAllBook() {
return bookMapper.queryAllBook();
}
}
|
整合spring
1
2
3
4
5
6
7
8
9
10
11
12
13
14
15
16
17
18
19
20
21
22
23
24
25
26
27
28
29
30
31
32
33
34
35
36
37
38
39
40
41
42
43
44
45
46
47
48
49
50
51
52
53
| <?xml version="1.0" encoding="UTF-8"?>
<beans xmlns="http://www.springframework.org/schema/beans"
xmlns:xsi="http://www.w3.org/2001/XMLSchema-instance"
xmlns:context="http://www.springframework.org/schema/context"
xsi:schemaLocation="http://www.springframework.org/schema/beans http://www.springframework.org/schema/beans/spring-beans.xsd
http://www.springframework.org/schema/context https://www.springframework.org/schema/context/spring-context.xsd">
<context:property-placeholder location="classpath:db.properties"/>
<bean id="dataSource" class="com.mchange.v2.c3p0.ComboPooledDataSource">
<property name="driverClass" value="${driver}"/>
<property name="jdbcUrl" value="${url}"/>
<property name="user" value="${username}"/>
<property name="password" value="${password}"/>
<property name="maxPoolSize" value="30"/>
<property name="minPoolSize" value="10"/>
<property name="autoCommitOnClose" value="false"/>
<property name="checkoutTimeout" value="10000"/>
<property name="acquireRetryAttempts" value="2"/>
</bean>
<bean id="sqlSessionFactory" class="org.mybatis.spring.SqlSessionFactoryBean">
<property name="dataSource" ref="dataSource"/>
<property name="configLocation" value="classpath:mybatis-config.xml"/>
</bean>
<bean class="org.mybatis.spring.mapper.MapperScannerConfigurer">
<property name="sqlSessionFactoryBeanName" value="sqlSessionFactory"/>
<property name="basePackage" value="com.hg.mapper"/>
</bean>
</beans>
|
service层编写
1
2
3
4
5
6
7
8
9
10
11
12
13
| @SuppressWarnings("all")
public interface BookService {
int addBook(Books book);
int deleteBookById(int id);
Books queryBookById(int id);
int updateBook(Books book);
List<Books> queryAllBook();
}
|
1
2
3
4
5
6
7
8
9
10
11
12
13
14
15
16
17
18
19
20
21
22
23
24
25
26
27
28
29
30
31
32
| public class BookServiceImpl implements BookService{
BookMapper bookMapper;
public void setBookMapper(BookMapper bookMapper) {
this.bookMapper = bookMapper;
}
@Override
public int addBook(Books book) {
return bookMapper.addBook(book);
}
@Override
public int deleteBookById(int id) {
return bookMapper.deleteBookById(id);
}
@Override
public Books queryBookById(int id) {
return bookMapper.queryBookById(id);
}
@Override
public int updateBook(Books book) {
return bookMapper.updateBook(book);
}
@Override
public List<Books> queryAllBook() {
return bookMapper.queryAllBook();
}
}
|
1
2
3
4
5
6
7
8
9
10
11
12
13
14
15
16
17
18
19
20
21
22
23
24
25
| <?xml version="1.0" encoding="UTF-8"?>
<beans xmlns="http://www.springframework.org/schema/beans"
xmlns:xsi="http://www.w3.org/2001/XMLSchema-instance"
xmlns:aop="http://www.springframework.org/schema/aop"
xmlns:context="http://www.springframework.org/schema/context"
xsi:schemaLocation="http://www.springframework.org/schema/beans http://www.springframework.org/schema/beans/spring-beans.xsd
http://www.springframework.org/schema/aop https://www.springframework.org/schema/aop/spring-aop.xsd
http://www.springframework.org/schema/context https://www.springframework.org/schema/context/spring-context.xsd">
<context:component-scan base-package="com.hg.service"/>
<bean id="bookServiceImpl" class="com.hg.service.BookServiceImpl">
<property name="bookMapper" ref="bookMapper"/>
</bean>
<bean id="transactionManager" class="org.springframework.jdbc.datasource.DataSourceTransactionManager">
<property name="dataSource" ref="dataSource"/>
</bean>
</beans>
|
整合springMVC
1
2
3
4
5
6
7
8
9
10
11
12
13
14
15
16
17
18
19
20
21
22
23
24
25
26
27
28
29
30
31
32
33
34
35
36
37
38
39
40
41
| <?xml version="1.0" encoding="UTF-8"?>
<web-app xmlns="http://xmlns.jcp.org/xml/ns/javaee"
xmlns:xsi="http://www.w3.org/2001/XMLSchema-instance"
xsi:schemaLocation="http://xmlns.jcp.org/xml/ns/javaee http://xmlns.jcp.org/xml/ns/javaee/web-app_4_0.xsd"
version="4.0">
<servlet>
<servlet-name>springmvc</servlet-name>
<servlet-class>org.springframework.web.servlet.DispatcherServlet</servlet-class>
<init-param>
<param-name>contextConfigLocation</param-name>
<param-value>classpath:applicationContext.xml</param-value>
</init-param>
<load-on-startup>1</load-on-startup>
</servlet>
<servlet-mapping>
<servlet-name>springmvc</servlet-name>
<url-pattern>/</url-pattern>
</servlet-mapping>
<filter>
<filter-name>encoding</filter-name>
<filter-class>org.springframework.web.filter.CharacterEncodingFilter</filter-class>
<init-param>
<param-name>encoding</param-name>
<param-value>utf-8</param-value>
</init-param>
</filter>
<filter-mapping>
<filter-name>encoding</filter-name>
<url-pattern>/*</url-pattern>
</filter-mapping>
<session-config>
<session-timeout>10</session-timeout>
</session-config>
</web-app>
|
1
2
3
4
5
6
7
8
9
10
11
12
13
14
15
16
17
18
19
20
21
22
23
24
| <?xml version="1.0" encoding="UTF-8"?>
<beans xmlns="http://www.springframework.org/schema/beans"
xmlns:xsi="http://www.w3.org/2001/XMLSchema-instance"
xmlns:mvc="http://www.springframework.org/schema/mvc"
xmlns:context="http://www.springframework.org/schema/context"
xsi:schemaLocation="http://www.springframework.org/schema/beans http://www.springframework.org/schema/beans/spring-beans.xsd
http://www.springframework.org/schema/mvc http://www.springframework.org/schema/mvc/spring-mvc.xsd
http://www.springframework.org/schema/context http://www.springframework.org/schema/context/spring-context.xsd">
<mvc:annotation-driven/>
<mvc:default-servlet-handler/>
<context:component-scan base-package="com.hg.controller"/>
<bean class="org.springframework.web.servlet.view.InternalResourceViewResolver">
<property name="prefix" value="/WEB-INF/jsp/"/>
<property name="suffix" value=".jsp"/>
</bean>
</beans>
|


